Main Halyard (using cleat)
Due to the high load on the main halyard which can cause the sail to drop a bit when the kicker is on, most people use a lorry hitch in the main halyard so that the tail can be taken around the top hook of the cleat on the mast and then up through the lorry hitch loop and back to the cleat on the mast. This gives a 3:1 purchase on the halyard at the cleat and it is much less likely to slip. This article describes an alternative to the lorry hitch which lessens the wear in the halyard.
The photo's with the red halyard and text are courtesy of Bob Ladell, ISO 814, King George SC.
 |
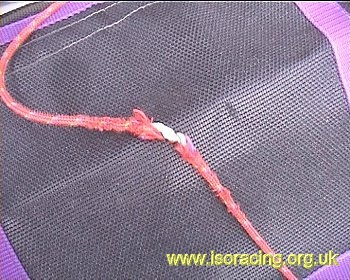
We used the slip knot approach as described in other ISO Tweaks on a Dyneema halyard. The result after only about 3 months was a severely damaged braid as shown. After 8 months of using the floating cleat below we do not have any sign of damage. |
|
|
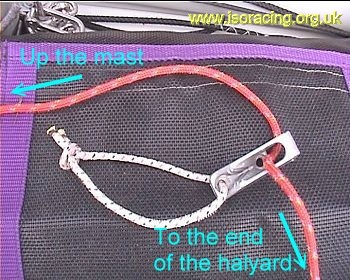
To preserve the halyard and the purchase afforded by the slip knot we've tried a floating cleat. It's a Racing Junior Mk2 cleat (same as the jib tension at the bottom of the mast) with a small loop of Dyneema tied to the lower cleat fixing hole. The halyard is fed through the top. For the Class Rules folks this is adding a cleat not a block. The purchase afforded is rope to rope in exactly the same way as the slip knot. |
 |
Hold the floating cleat clear of the halyard during the hoisting of the main. Now pass the tail around the hook part of the bottom cleat,Back through the small loop of rope, which is attached to the floating cleat (as if it is the slip knot).
Now cleat it in the same way as for the slip knot After the cleat, pass the loose tail round the side of the cleat so it doesn't uncleat. To remove, simply snap the cleat away from the halyard and hold it clear - works for us! |


